Project Mix Pre-Alpha Demo Video Using Quartz Instead of TimeSynth

https://www.youtube.com/watch?v=DgTvE5r_4qQ
It has been quite awhile since I have done a formal write-up going over the details of project mix and what to do next. Right off the bat, we have some sort of an art style starting to evolve! However, I think there might be a few other options I'd like to explore.
Going From TimeSynth to Quartz in UE4.26
As much as I loved the Time Synth, this is something that was absolutely crucial to making progress. I was spending so much time trying to integrate features that already exist for every other audio thing in the engine and fix audio crackles / decoding issues with the Time Synth Component. The good thing is, I now have way more of an idea of how audio actually works in unreal! I scrapped about 1000 lines of engine override code and now directly integrated everything using quartz.. it was a ton of work but ended up being really powerful!
What is Quartz?
This is the new subsystem that allows you to Play any audio component quantized to a beat clock. This means that you no longer have to activate 5 plugins to get something like this working AND .. the biggest win is it is truly available on ANY AUDIO COMPONENT. Which means it also works with audio cues!
Here is a very very basic setup of Quartz.
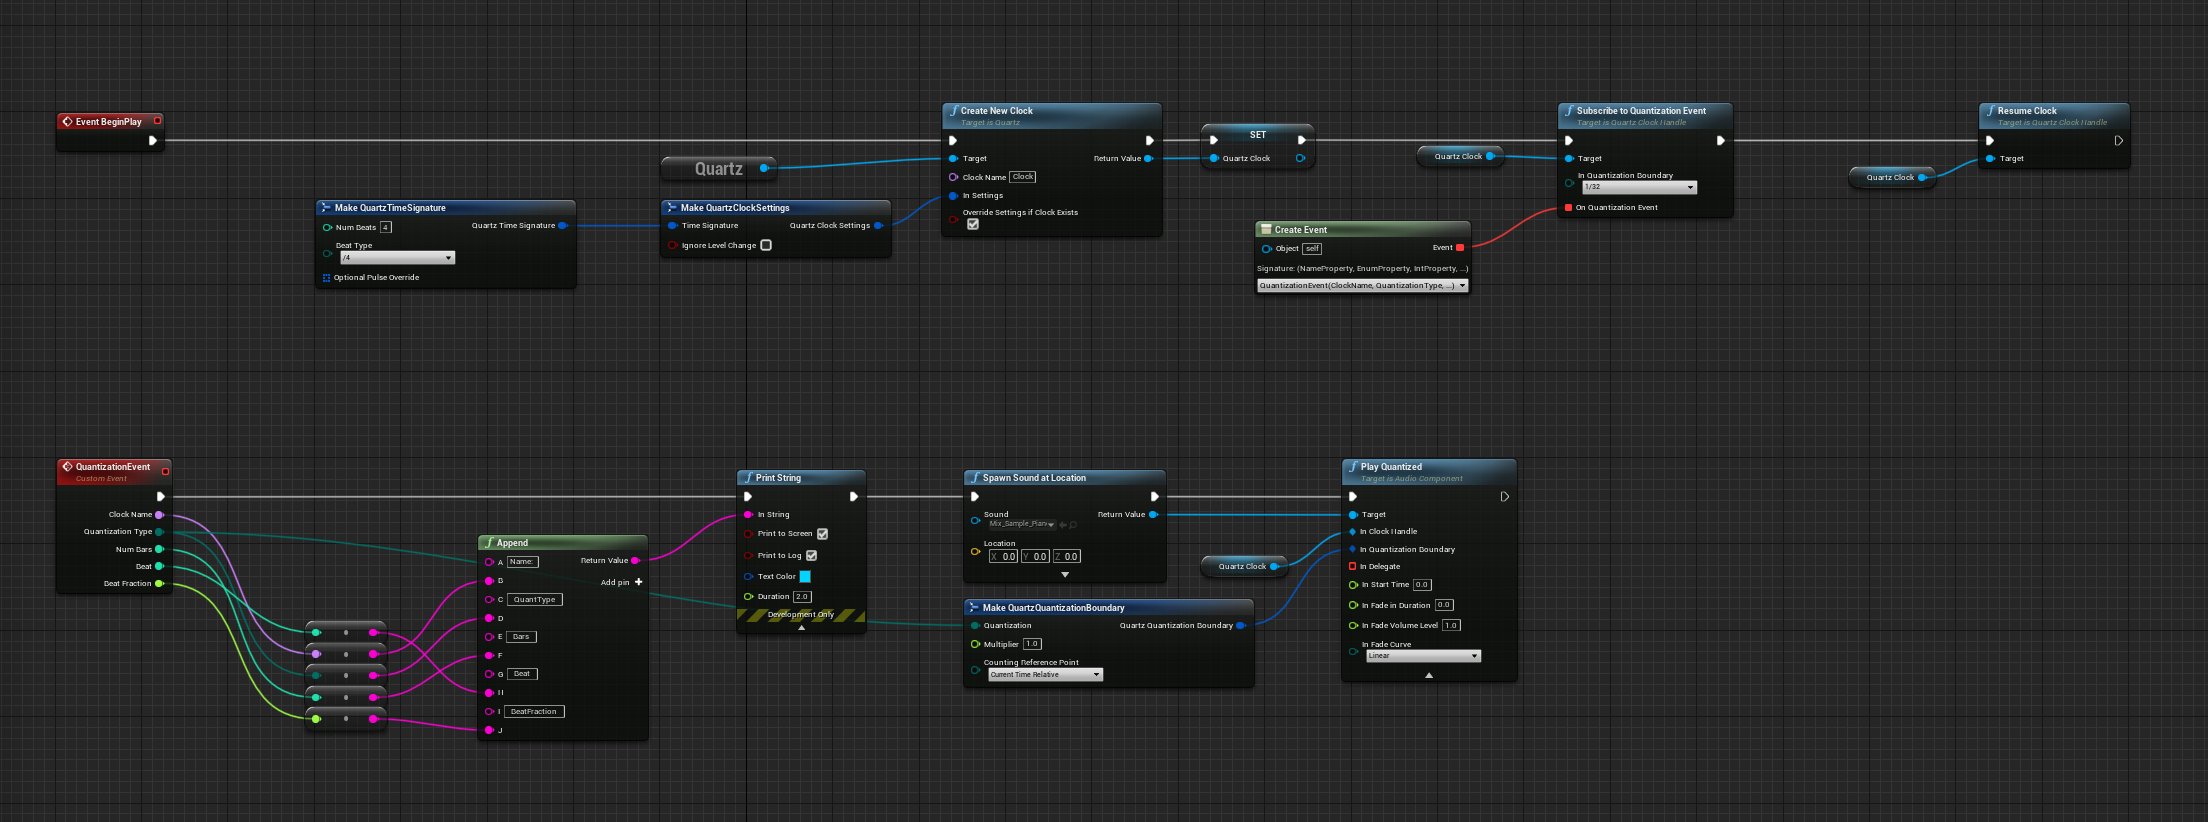
On Begin Play I get the quartz subsystem and make a new clock! This node also allows you to override an existing clock which means its safe to call multiple times. Clocks are sorted by name and can be called upon by name later too so make sure you have an actual name in there. From there I save the quartz clock as a variable and then subscribe to a quantization event. You can think of this as hooking into the system so that every time a beat plays, it fires an event.
NOTE: This event is always going to be at the start of a beat, which means that it will give plenty of time (If your frame-rate isn't terrible) to setup the audio that is needed to play next beat. This part has always been tricky to work around even with the Time Synth. Basically you have to treat everything like a queue and make sure that whatever system you are writing is ahead a certain amount of time so that when you call this "Play Quantized" node on an audio component, it is exactly 1 beat behind where you want it to actually play.
If you'd like to see more, you can head over to "Dan Reynolds Audio" on Youtube. He goes over a pretty nice introduction of exactly this type of thing and a little more details.
https://www.youtube.com/watch?v=-ZV7S0XtDDs
The point here is that there is so much potential with how to use this system I could talk for hours about it!
How does Project Mix work with Quartz?
Some of the key things that quartz did was fix timing issues. After awhile TimeSynth would desync and become rather unreliable. It also had quite a few crashes that I was accounting for in a really bad way!
Everything syncs to a beat!
The beat clock is the most important thing to a system like this. Quartz Subscription to quantization event means that we can essentially treat one of these as our main driver for activation! So starting off, I subscribe to a quartz event on 1/16 notes. 1/32 is a bit too close to tick for comfort currently and complicates the process of setting up timing a bit too much in my opinion. I might switch it later, but I've found 1/16 to be the most reliable.
Once subscribed to a 1/16th note quantization event, I then send this event to every node and link in the system. From here they will decide what to do based on which beat they think they should be activated on next. Remember what I said before where you have to queue up a beat before-hand in order to properly quantize? Yea.... that makes thing quite a pain is the ass! However, essentially what I do is just make sure the entire system is a beat ahead so that to the player, they won't really know the difference!
To understand how everything works with project MIX a bit more in-depth lets talk about nodes and links. In the MIX system I call them Devices and all of the Devices operate from a brain that I call "The Machine"
The Machine.
This is where the heartbeat is established and everything related to events for the system is handled in here as well. The machine's job is to essentially distribute the heartbeat to every device in the system! This also means we can control order of ticking, what actually is ticking, etc all from one place without having to do custom tick groups or any junk like that.
Machine Device Nodes
These operate simply be being the sound makers and general activators. They have access to links and also have all of the information on what sample they are supposed to play. We can go over samples later! Simply put though, nodes are the intersections in a highway type system that tell other links to activate and whether or not to play sound.
Nodes can have an infinite amount of links that activate it or that need to be activated after the node is activated.
Machine Device Links

Links are connected to a START and and END node. When a START node is activated, we then tell the END node that it should be activated in however many beats the link is active for. Links can only be activated once per duration of activation. This means that if a Node is to fire off twice while the link is still active, it will ignore the second activation request. Simple enough right? Well... this is where things get hairy.
Solving some pretty critical sync issues! ( a bit of a ramble but could be useful to someone in a similar tricky scenario)
One of the trickiest hurdles to solve was the order of beats. Imagine this scenario, Nodes and links can activate when they think they should be active. However timing and everything is very important to be setup during these activated states. For instance.. when a Node gets activated, it sets up how long it needs to be active for and tells links that they should do the same. Unfortunately, there is really only one event that gets sent out to do this. Which means in some cases when dealing with 1000's of nodes all trying to figure out when they should activate, you run into situations where the activation was sent but the order of activation ends up making it so that it needs to wait until the next heartbeat in order to properly activate it! Which is not ideal at all since 1 more heartbeat would lead to the result of something being off sync. The fix was making sure to treat the state machine on the devices as a desired stated instead of instant changes. This allows for a loop to constantly run that handles the state changes which gets populated anytime the state needs to change. This allows for the order to work as requested and for everything to be finished in the same heart beat event!
For those that are C++ savy, here is what I mean.
When a device state change happens, we add it to an array on the machine that is constantly running until it finishes during the quantization beat event.
void AMIXDevice::SetDeviceState_Implementation(EMIXDeviceState NewDeviceState){if (NewDeviceState != NextDeviceState){if (IsValid(Machine)){Machine->AddDeviceNeedingStateChange(this);}NextDeviceState = NewDeviceState;}}
The event that handles sending out the quantization event to the devices.
void AMIXMachine::SendQuantizationToDevices_Implementation(FName ClockName, EQuartzCommandQuantization QuantizationType, int32 NumBars, int32 Beat, float BeatFraction){// Send quantization events out to connected devices.for (int32 DeviceIndex = 0; DeviceIndex < Devices.Num(); DeviceIndex++){if (Devices.IsValidIndex(DeviceIndex)){AMIXDevice* Device = Devices[DeviceIndex];if (IsValid(Device) && Device->QuantizationType == QuantizationType){Device->MachineQuantizationEvent(NumBars, Beat, BeatFraction);Device->HandleDeviceStates(true);}}}// Now handle state changes properly. This is a dynamic array that will get populated any time a state change happens!for (int32 DeviceIndex = 0; DeviceIndex < DevicesNeedingStateChanges.Num(); DeviceIndex++){if (DevicesNeedingStateChanges.IsValidIndex(DeviceIndex)){AMIXDevice* Device = DevicesNeedingStateChanges[DeviceIndex];if (IsValid(Device) && Device->QuantizationType == QuantizationType){Device->HandleDeviceStates(false);DevicesNeedingStateChanges.RemoveAt(DeviceIndex);DeviceIndex -= 1;continue;}}}}
The result is this! The ability to accurately handle about 200 devices in a scene all at 90fps at 300bpm with 1/16 notes!
https://www.youtube.com/watch?v=5TUgfSypHgY
Wee!
Samples
This is very very much still subject to change, but one of the defining characteristics of project mix is the ability to compose something out of nothing. This requires a sample library that is setup in a way to handle multiple velocities and per note samples. The DAW that I primarily use is FL-studio. Ultimately I would love to find a way to export directly from FL-studio into the library format I use so that I could compose an entire song and get it imported into the link and node format (Maybe some day! Baby steps first!)
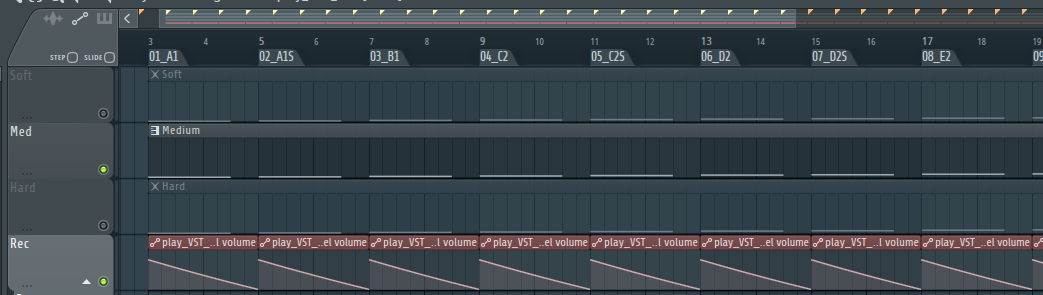
It Starts with a DAW
In FL-studio I setup a project that has markers for each note on an 88 key note scale. All Samples are recorded in a way that is faithful to the copyright agreements for each of the different companies I obtain them from. This being said, I still needed to contact each company individually to make 100% sure that it wasn't in violation of their terms as some of them require further licensing/permissions before allowing something like this to not be considered "Reselling a Sample Pack". Lastly, nothing is used without modification and nothing is saved off 1-1. Furthermore when the product is cooked, it is compressed by 40% so they will never be the same as buying the plugins, kits, or whatever and using them for production.
From here I export 1 file out and then split it into multiple files based on the markers using FL-studio's "Edison" plugin.

Using Edison to split the audio into multiple wav files.
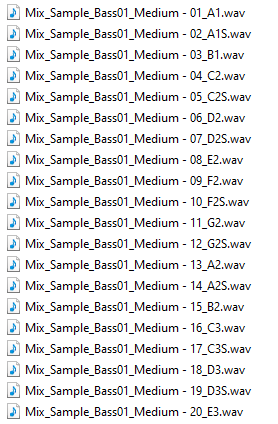
Exported audio files.
Importing Samples Into Unreal
Now that we have the files setup, we can go ahead and get them into unreal. This part is mostly tedius, but I have setup a tool in unreal using an editor utility widget that can search and parse the files by name to get them into a data format I expect.
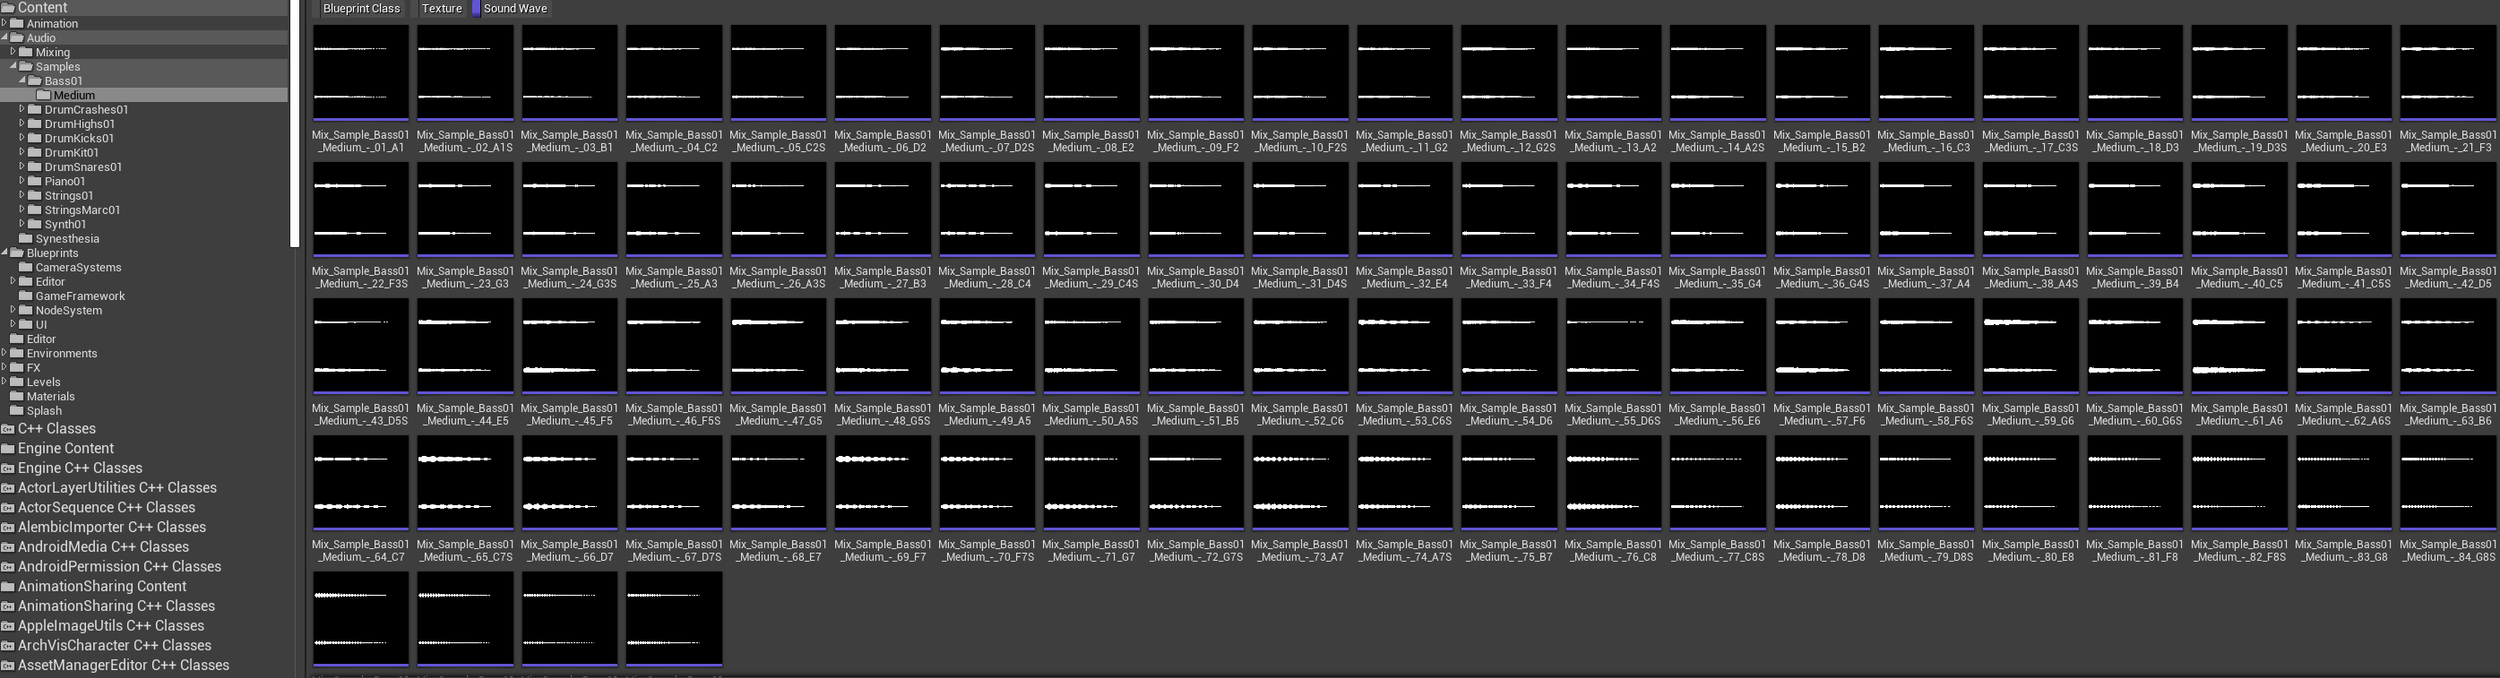
The folder structure I use is Audio/Samples/Type/Velocity. (Soft ,Medium, and Hard). Velocity refers to how hard a key was pressed on the piano. This allows us to blend between sounds rather nicely.
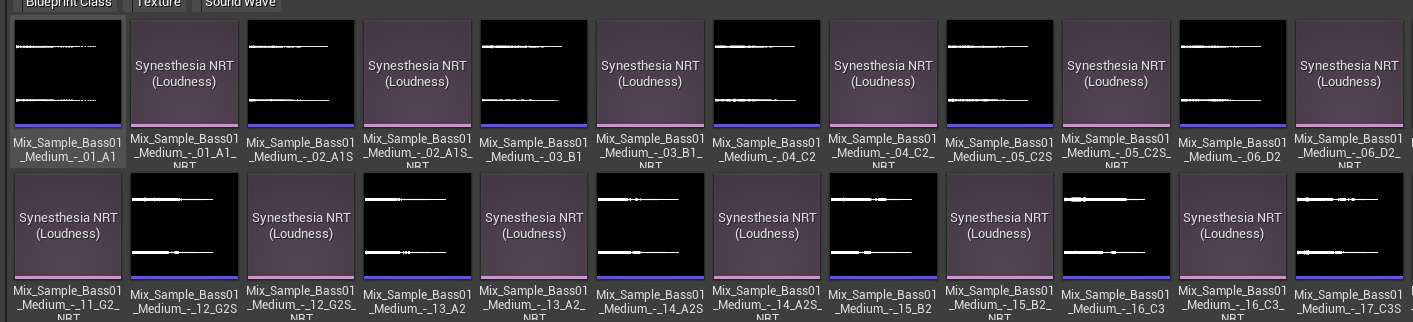
From here, I need to generate the Audio Synesthesia data which will be used by the system to generate visualization data for the nodes to use when the sound activates. I was able to do this by making an editor utility widget to handle creation.

Blueprint inside of the Editor Utility Widget that handles creation of NRT assets when selecting the soundwaves.
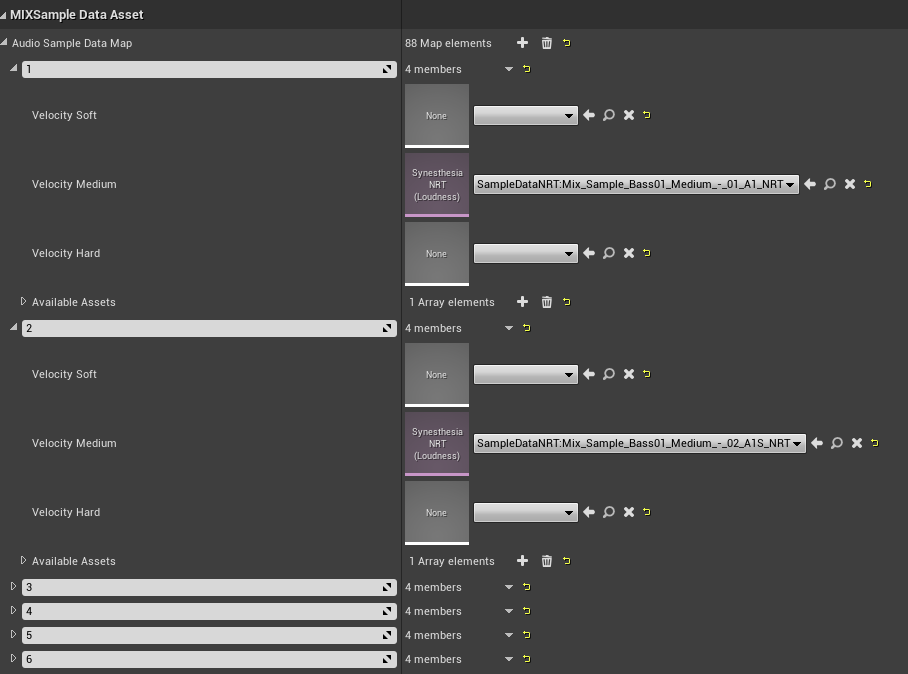
Once I have that all setup, I create a data sample asset which is a custom one that has a TMAP in it for storing all of this per note. ANOTHER NOTE: (Pun intended) whenever setting up data structures like this in unreal its extremely important to use soft references or primary data assets. This allows you to handle the Loading of your data manually instead of unreal thinking you need to load everything whenever you reference the data structure directly. Its really good practice to do so and will prevent turmoil in the long run!
Node Settings for Samples.
On each node I made a structure for playing samples.

Channel refers to what track on the final mixer to use. There are 16 available so that I can mix each instrument individually and then on top of that each sample has volume controls too. This is also something that is pretty subject to upgrades and changes since its widely going to be how complex I am wanting to go in the future.
Utilizing the basics of Audio Synesthesia for loudness visualization.
Why audio synesthesia and not just the build in FFT data?
I have found that the built in FFT system doesn't account for perceived loudness nearly as well and also has points where it seems to not be as accurate as I would like it to be. Audio Synesthesia is pretty spectacular and decently easy to use.
In the future I would love to do spectral information too and not just loudness, but for now I am starting off simple. All of those NRT assets I created now can be utilized when making the sounds. This is actually a ton more complex than anticipated. In blueprint they require you to bind to an active sound in order to get the current playback time of a sound component. I CANNOT use blueprint that much anymore due to the CPU Overhead of the blueprint virtual machine. In code I really didn't want to set this up with delegates, it would just massively complicate the process of checking playback time on potentially 100s of active sounds. So instead, I added some engine overrides to the audio component.
In AudioComponent.cpp
//ENGINE OVERRIDETArray<USoundWave*> UAudioComponent::GetPlaybackTimes(TArray<float>& OutPlaybackTimes, TArray<float>& OutVolumes){TArray<USoundWave*> Output = TArray<USoundWave*>();float FadeVolume = 0.0f;if (FAudioDevice* AudioDevice = GetAudioDevice()){if (IsActive()){const uint64 MyAudioComponentID = AudioComponentID;FActiveSound* ActiveSound = AudioDevice->FindActiveSound(MyAudioComponentID);if (ActiveSound){FadeVolume = ActiveSound->ComponentVolumeFader.GetVolume();}}}if (IsPlaying() && SoundWavePlaybackTimes.Num() > 0){for (auto Entry : SoundWavePlaybackTimes){Output.Add(Entry.Value.SoundWave);OutPlaybackTimes.Add(Entry.Value.PlaybackTime);OutVolumes.Add(FadeVolume);}}return Output;}
This gives me the playback time on every sound that is playing from that component. One issue you'll notice out of the gate is "FindActiveSound" has an audio thread check in it to ensure that its only called on the audio thread... I just commented that out that for now. I could potentially route it much nicer later using the proper "Run On Audio Thread" commands, but I have found that the audio team in particular is a bit overzealous with their check()'s in code to make sure the audio system is as stable as possible (Makes a ton of sense, but also means that most of the time it seems to be ok breaking some of these rules).
Using that, I can then gather the needed information for the perceived loudness of a sound on tick for any of the active sounds in my audio pool.
The Custom Audio Pool on The Machine
When a node plays a sound, I end up making an audio component on the fly and saving a reference to it in an audio pool structure. This is where I can then grab all of the sounds on tick and update the visual information for each sound in the pool. When they are finished I can then make sure they are properly removed. With this method, I am only processing what I need to and then I can also handle the proper routing of visual information as well. This information is 100% stored on the machine so that it only gets calculated once! Any information the node needs is sent over to it after its calculated.
Node Visuals Using the NRT Data
Finally we then can use this to drive a material that handles the visuals! This part is still in blueprint, but likely will be moved later.
For the nodes, we have 2 fresnels. On for the sharp outer line and another for the sharp inner circle. This is placed on a spherical object and based on the settings we can control how much it animates. I called the parameter "Size" initially but it really should be called ActiveLoudness.
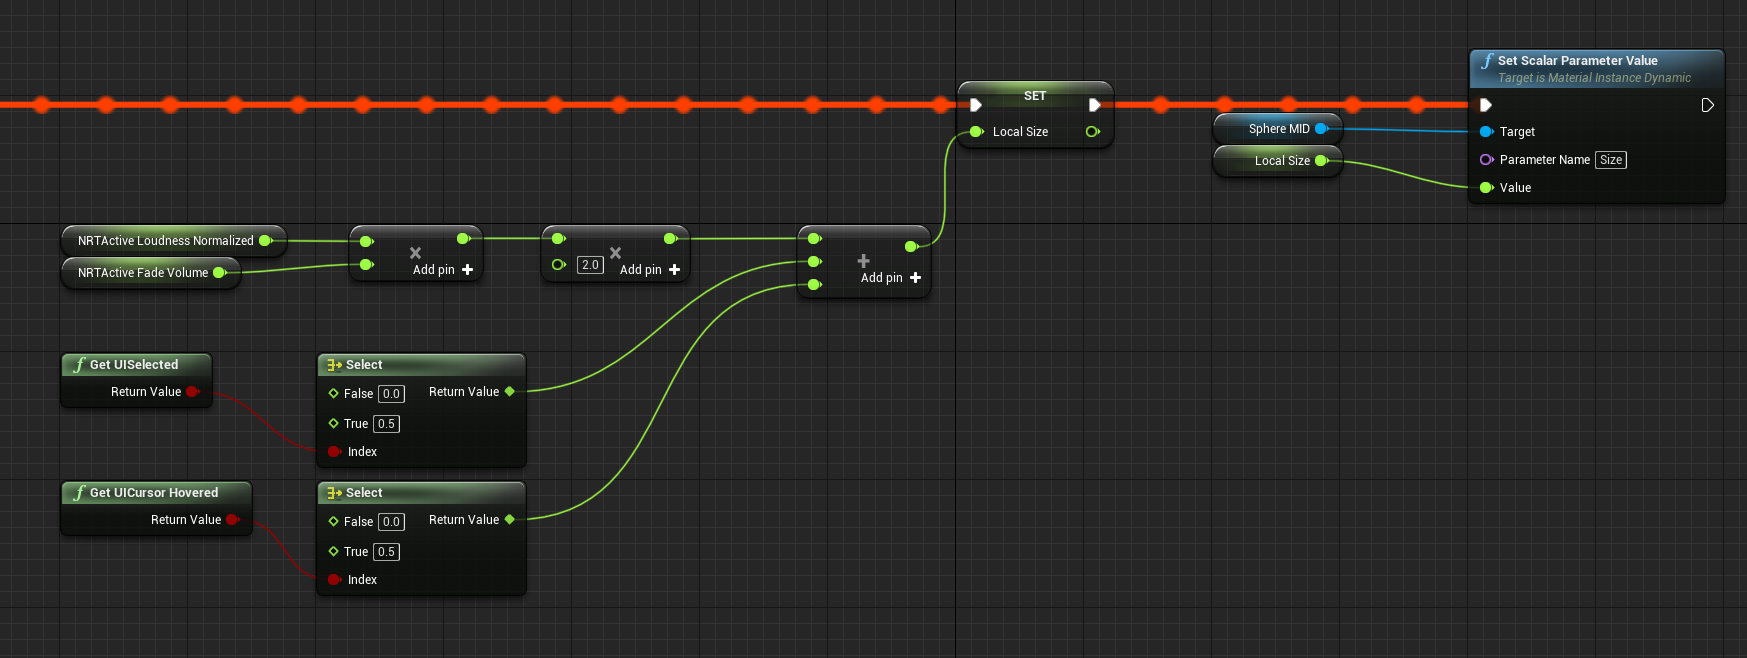
Material for nodes
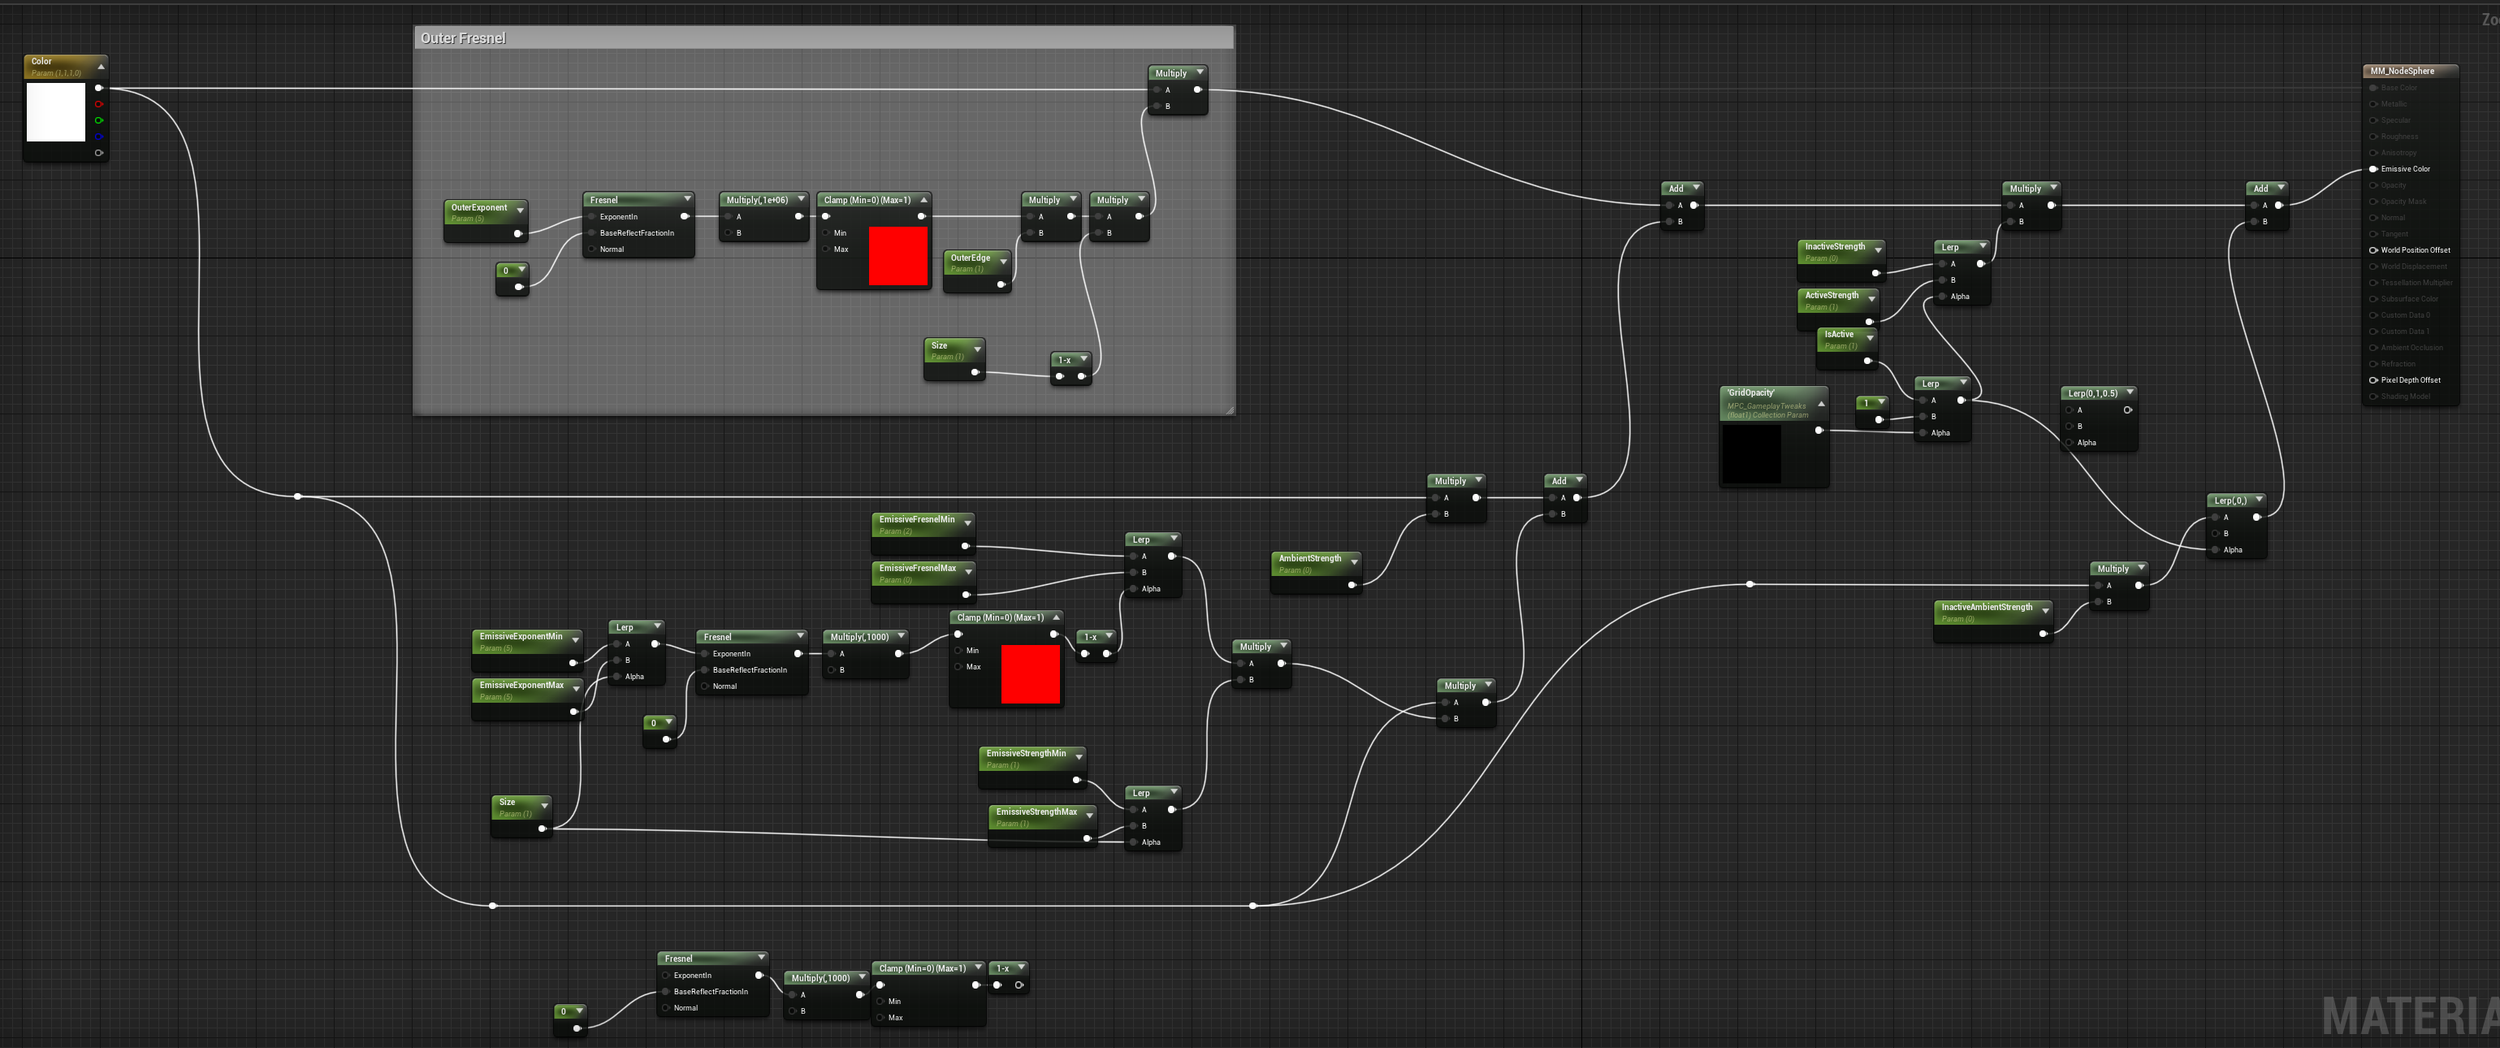
Material for the nodes (Size is the ActiveLoudness)
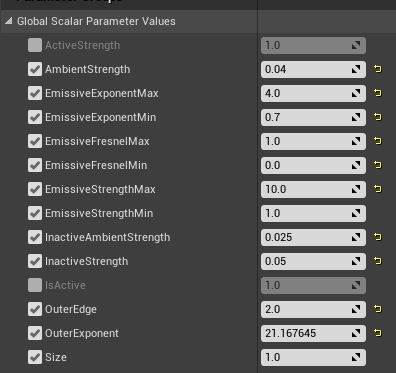
Material instance
The links and any other visualizer on the project has access to the NRT data and can use it knowing the only cost is the animated visual itself rather than calculating the data again.
If anyone has any questions about
What's Next for Project Mix?
There are a ton of roads that I could take for a project like this. Some people have suggested having the interactivity being driven from a DAW like ableton real-time for live concerts or experimentation. I think that would be pretty sweet but also super complex and I am also 99% sure epic is already doing something like that on a much larger scale for artists. So my initial focus is going to be as more of a toy beat maker thing.
Getting Interactivity with the nodes in a playable state.
Making new nodes on the fly in-game
Controlling links in-game
Potentially making links distance-based for their timing which would help gamify it a bit.
Sequence Nodes (Allowing nodes to play on a sequence)
Next Major Milestone is to be able to start with a blank level and make an entire composition from scratch. This will help prove the system out on a scale of usability that will allow it to grow wings in other areas. I am excited! Woot!
Thanks for making it this far and if you'd like updates or to stay in touch be sure to follow me on Twitter and/or subscribe to me on youtube.